24/7 EMERGENCY SERVICE AVAILABLE Call Now: (936)666-6995

Magnolia Appliance Repair Blog

Expert tips, maintenance guides, and industry news to help you keep your appliances running smoothly

5 Essential Refrigerator Maintenance Tips to Extend Its Lifespan

Learn the top maintenance practices that can help your refrigerator last longer and run more efficiently. From cleaning coils to proper temperature settings, these tips will save you money on repairs.

1. Clean the Condenser Coils Regularly

Dust and debris accumulate on the condenser coils (usually located at the back or bottom of your fridge), making the compressor work harder. Clean them every 6 months with a coil brush or vacuum cleaner.

Pro Tip

Unplug the refrigerator before cleaning coils for safety. If you have pets, you may need to clean more frequently as pet hair accumulates quickly.

2. Maintain Proper Temperature Settings

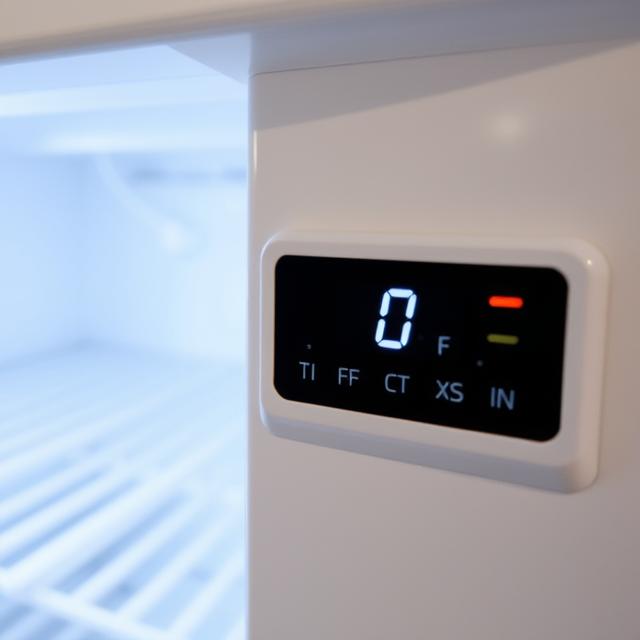
Your refrigerator should be between 35°F and 38°F (1.7°C to 3.3°C), and your freezer at 0°F (-18°C). Use an appliance thermometer to verify temperatures.

3. Check and Replace Door Seals

Damaged door seals (gaskets) allow cold air to escape. Test them by closing a dollar bill in the door - if it slips out easily, replace the seals.

Warning

A faulty door seal can increase your energy bill by 20% and cause your refrigerator to work much harder than necessary.

4. Defrost Manual-Defrost Freezers

If you have a manual-defrost freezer, defrost when frost builds up to 1/4 inch thick. Excess frost reduces efficiency and storage space.

5. Keep It Stocked (But Not Overcrowded)

A moderately stocked refrigerator maintains temperature better than an empty one. However, overcrowding blocks air circulation.

  • Leave space between items for air to circulate
  • Cover liquids and foods to prevent moisture buildup
  • Store foods properly to prevent premature spoilage

Frequently Asked Questions

How often should I clean my refrigerator coils?

We recommend cleaning your refrigerator coils every 6 months for optimal performance. If you have pets that shed, you may need to clean them every 3-4 months as pet hair can accumulate quickly and reduce efficiency.

What are the signs that my refrigerator door seal needs replacement?

Signs that your refrigerator door seal needs replacement include: visible cracks or tears in the gasket, condensation forming inside the fridge, food spoiling faster than usual, frost buildup in the freezer, and difficulty closing the door completely. You can test the seal by placing a dollar bill in the door and closing it - if it slides out easily, the seal may need replacement.

Common Washer Problems and How to Troubleshoot Them

Is your washing machine making strange noises or not spinning properly? Our comprehensive guide helps you diagnose common washer issues and determine when to call a professional.

Washer Won't Start

If your washer won't turn on at all:

Check that it's plugged in securely
Test the outlet with another device
Check circuit breakers or fuses
Ensure the door/lid is closed completely
Look for error codes on digital displays

Washer Not Draining

If water remains in the drum after a cycle:

  • Check for kinks in the drain hose
  • Clean the drain pump filter (consult your manual for location)
  • Inspect the drain hose for clogs
  • Check that the drain hose isn't too far inserted into the standpipe

Quick Fix

If your washer stops mid-cycle with water inside, try resetting it by unplugging for 1 minute, then restarting the drain/spin cycle.

Washer Making Loud Noises

Common noise sources and solutions:

Noise Type Possible Cause Solution
Grinding Worn motor coupling or bearings Professional repair needed
Thumping Unbalanced load Redistribute clothes evenly
Squeaking Worn belt or pulley Inspect and replace if needed

Washer Leaking Water

Check these common leak sources:

  • Inlet hoses (tighten connections or replace hoses)
  • Drain hose connection
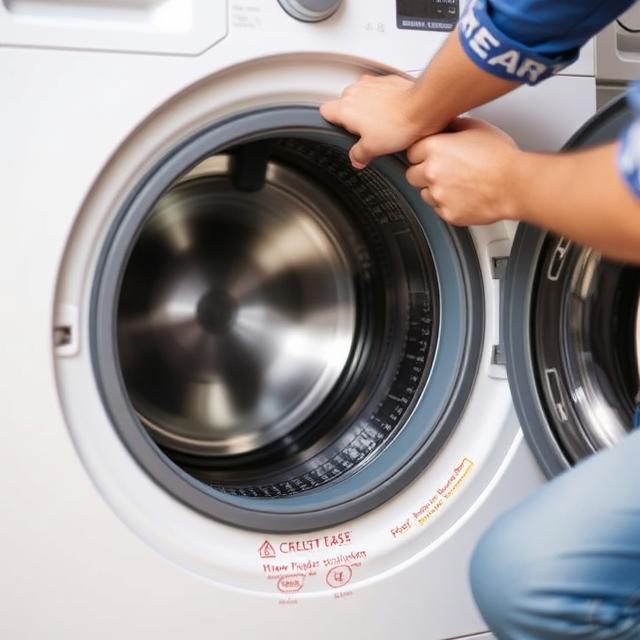
  • Door seal/gasket (clean or replace if damaged)
  • Internal tub seal (requires professional repair)

Safety First

Always unplug your washer before attempting any repairs involving electrical components or moving parts.

Frequently Asked Questions

How do I know if my washing machine pump is bad?

Signs of a bad washing machine pump include: the washer not draining properly, unusual noises during the drain cycle, water leaking from the bottom of the machine, or the machine stopping mid-cycle with water still inside. If you suspect a pump issue, check for clogs first before assuming the pump needs replacement.

Why does my washing machine shake violently during spin cycles?

Violent shaking during spin cycles is typically caused by an unbalanced load. Try redistributing the clothes evenly in the drum. If the problem persists, check that the machine is level (adjust the feet if necessary) and that the suspension rods or shock absorbers aren't worn out. Excessive vibration can damage other components over time.

Dryer Maintenance: Prevent Fires and Improve Efficiency

Learn how proper dryer maintenance can prevent dangerous lint buildup, improve drying efficiency, and extend your appliance's lifespan.

1. Clean the Lint Filter After Every Load

This simple habit improves airflow and drying efficiency while reducing fire risk.

Deep Cleaning Tip

Monthly, wash the lint filter with warm soapy water to remove residue buildup that reduces airflow.

2. Clean the Vent Duct Annually

A clogged vent duct is a leading cause of dryer fires. Signs you need cleaning:

  • Clothes take longer to dry
  • Dryer feels very hot to the touch
  • Noticeable lint accumulation around the dryer
Disconnect the dryer from power
Pull the dryer away from the wall
Disconnect the vent duct
Use a vent cleaning brush or vacuum to remove lint
Reconnect everything and test operation

Warning

Never operate your dryer without the lint filter in place, as this allows lint to accumulate in dangerous areas.

3. Check the Drum Seals

Worn drum seals can cause heat loss and inefficient drying. Inspect for:

  • Visible cracks or tears in the seals
  • Heat escaping from the door area
  • Unusual noises during operation

4. Level Your Dryer

An unlevel dryer can cause excessive vibration and wear. Use a level to check and adjust the feet as needed.

5. Know When to Call a Professional

Contact a technician if you notice:

  • Burning smells during operation
  • The dryer stops mid-cycle
  • Unusual noises that persist after basic maintenance
  • Error codes you can't resolve

Frequently Asked Questions

How often should I clean my dryer vent?

We recommend cleaning your dryer vent at least once a year. However, if you do more than 5 loads of laundry per week, have a long vent run (over 10 feet), or notice clothes taking longer to dry, you should clean it more frequently - every 6 months. Regular cleaning prevents fire hazards and improves dryer efficiency.

What are the signs that my dryer needs professional repair?

Signs your dryer needs professional attention include: not heating at all, making loud grinding or squealing noises, not tumbling clothes properly, stopping mid-cycle, displaying error codes, or if you smell burning when it runs. These issues often indicate problems with heating elements, motors, belts, or other internal components that require specialized tools and knowledge to repair safely.

Oven Not Heating? Common Problems and Solutions

When your oven won't heat properly, it could be due to several issues. Learn how to diagnose common oven heating problems and when to call for professional help.

1. Check the Power Source

Before assuming the worst, verify basic power issues:

Ensure the oven is plugged in (for electric models)
Check your circuit breaker or fuse box
Verify the gas supply is on (for gas ovens)
Check if other oven functions work (lights, display)

2. Common Electric Oven Issues

Symptom Possible Cause Solution
Oven not heating at all Bake element burned out Replace bake element
Oven heats unevenly Faulty temperature sensor Replace sensor or calibrate
Oven overheats Faulty control board Professional repair needed

3. Common Gas Oven Issues

Symptom Possible Cause Solution
Oven won't ignite Faulty igniter Replace igniter
Flame goes out Faulty safety valve Professional repair needed
Gas smell Gas leak Turn off gas and call professional immediately

Critical Warning

If you smell gas, turn off the gas supply immediately, open windows, and call a professional. Do not attempt to use the oven or create any sparks.

4. When to Call a Professional

Contact an appliance repair technician for:

  • Electrical issues beyond basic element replacement
  • Gas line or ignition system problems
  • Control board or electronic component failures
  • Any repairs requiring disassembly of the oven

Frequently Asked Questions

How do I know if my oven heating element is bad?

Signs of a bad oven heating element include: visible cracks or blisters on the element, the oven not heating at all, uneven heating, or the element not glowing red when the oven is on. You can also test the element with a multimeter for continuity - if there's no continuity, the element needs replacement.

Why does my gas oven take so long to preheat?

A gas oven that takes too long to preheat may have a weak igniter (which should glow bright orange when working properly), a faulty temperature sensor, or problems with the gas flow. The igniter is the most common culprit - as it weakens with age, it takes longer to open the gas valve. If your oven takes more than 10-15 minutes to reach 350°F, consider having it inspected.

The Ultimate Dishwasher Maintenance Checklist

Keep your dishwasher running smoothly with our monthly maintenance checklist. Simple steps to prevent common issues and ensure spotless dishes every time.

Monthly Maintenance Tasks

1. Clean the Filter

Most dishwashers have a removable filter at the bottom. Clean it monthly:

Remove the bottom rack
Twist or unlatch the filter assembly
Rinse under warm water, using a soft brush for stubborn debris
Reinstall completely before next use

Pro Tip

Check your manual for specific filter cleaning instructions as designs vary by manufacturer.

2. Clean Spray Arms

Clogged spray arm holes reduce cleaning performance:

  • Remove spray arms (usually twist-off)
  • Use a toothpick to clear clogged holes
  • Soak in vinegar if mineral deposits are present
  • Rinse thoroughly before reinstalling

3. Run a Cleaning Cycle

Monthly deep cleaning options:

  • Commercial dishwasher cleaner (follow package instructions)
  • 1 cup white vinegar placed in a dishwasher-safe container on the top rack
  • 1/2 cup baking soda sprinkled on the bottom of the tub

Quarterly Maintenance

1. Check Door Seal

Inspect the rubber gasket around the door for:

  • Food debris (wipe clean with damp cloth)
  • Mold or mildew (clean with vinegar solution)
  • Cracks or tears (requires replacement)

2. Inspect Drain Hose

Prevent clogs and leaks by:

  • Checking for kinks in the hose
  • Ensuring proper connection to garbage disposal or drain
  • Clearing any debris from the air gap (if present)

Warning

Always disconnect power before inspecting any dishwasher components to avoid electrical shock.

Usage Tips for Best Performance

  • Scrape (don't rinse) dishes before loading
  • Load dishes properly to allow water flow
  • Use the right detergent for your water hardness
  • Run hot water at the sink before starting the dishwasher
  • Use the appropriate cycle for the load

Frequently Asked Questions

Why does my dishwasher leave spots on my dishes?

Spots on dishes are usually caused by hard water minerals. Try using a rinse aid, check that your detergent is fresh (old detergent loses effectiveness), and ensure you're using the correct amount for your water hardness. If you have very hard water, consider installing a water softener or using a dishwasher cleaner monthly to remove mineral buildup.

How can I tell if my dishwasher pump is failing?

Signs of a failing dishwasher pump include: dishes not getting clean, standing water in the bottom after cycles, unusual noises during operation (grinding, humming), or error codes related to water drainage. First check for clogs in the filter and drain hose before assuming the pump needs replacement.

Freezer Maintenance: Prevent Frost Buildup and Food Spoilage

Proper freezer maintenance prevents frost buildup, ensures food stays frozen, and extends appliance life. Learn essential freezer care tips.

1. Defrost Regularly (For Manual-Defrost Models)

Defrost when frost exceeds 1/4 inch thickness:

Remove all food and store in coolers
Turn off and unplug the freezer
Place towels to catch melting water
Use plastic scraper to remove large ice chunks
Wipe down interior when complete
Plug back in and return food when cold

Time-Saving Tip

Place bowls of hot water in the freezer to speed up defrosting. Replace as they cool.

2. Check Door Seals

Faulty seals allow warm air in, causing frost buildup:

  • Clean seals with mild soap and water
  • Check for cracks or tears
  • Test seal strength with dollar bill test

3. Maintain Proper Temperature

Ideal freezer temperature is 0°F (-18°C). Use an appliance thermometer to verify.

4. Organize Contents for Airflow

Proper organization prevents cold spots:

  • Don't overpack - leave space for air circulation
  • Store similar items together
  • Keep frequently used items accessible

5. Clean Condenser Coils

Dirty coils make the compressor work harder:

Unplug the freezer
Locate coils (back or bottom)
Vacuum or brush away dust
Plug back in

Warning

Never use sharp objects to remove ice as you may puncture coolant lines. Use plastic scrapers only.

Frequently Asked Questions

Why is my freezer frosting up even though it's self-defrosting?

If your self-defrosting freezer is accumulating frost, possible causes include: a faulty defrost timer, bad defrost heater, malfunctioning defrost thermostat, or a clogged defrost drain. These components work together to melt frost automatically. When one fails, frost builds up. This typically requires professional diagnosis and repair.

How often should I replace my freezer?

The average lifespan of a freezer is 10-15 years. Consider replacement if: repairs cost more than half the price of a new unit, it runs constantly (high energy bills), temperature fluctuates significantly, or it requires frequent repairs. Modern freezers are much more energy-efficient, so upgrading can save money in the long run.

Need Professional Appliance Repair in Magnolia?

Our certified technicians are ready to help with all your appliance repair needs. Same-day service available for most repairs.

Appliance Repair FAQs

Common questions about appliance repair and maintenance

How much does appliance repair typically cost?

Appliance repair costs vary depending on the type of appliance, the specific problem, and the parts needed. On average, you can expect:

  • Refrigerator repairs: $200-$400
  • Washer repairs: $150-$350
  • Dryer repairs: $100-$300
  • Dishwasher repairs: $150-$300
  • Oven/range repairs: $100-$400

We offer free diagnostic visits with repair, and our technicians will always provide a clear estimate before beginning any work.

How do I know if I should repair or replace my appliance?

Consider these factors when deciding between repair and replacement:

  • Age of appliance: If it's over 10 years old, replacement may be more cost-effective
  • Cost of repair: If repairs exceed 50% of the cost of a new appliance
  • Energy efficiency: Newer models are often much more energy efficient
  • Frequency of repairs: If you're repairing the same appliance multiple times per year

Our technicians can help you evaluate your specific situation to make the best decision.

How can I prevent appliance breakdowns?

Regular maintenance is key to preventing appliance breakdowns:

  • Clean refrigerator coils every 6 months
  • Clean dryer vents annually
  • Run dishwasher cleaner monthly
  • Check and clean washer filters regularly
  • Inspect oven seals for damage
  • Follow manufacturer's maintenance recommendations

Our blog has detailed maintenance guides for all major appliances.

Call Now